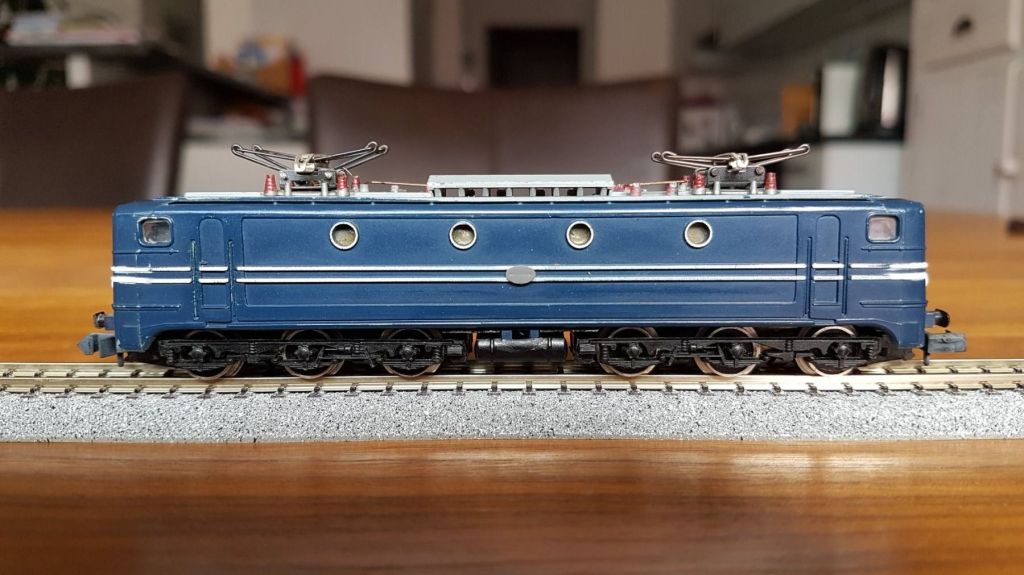
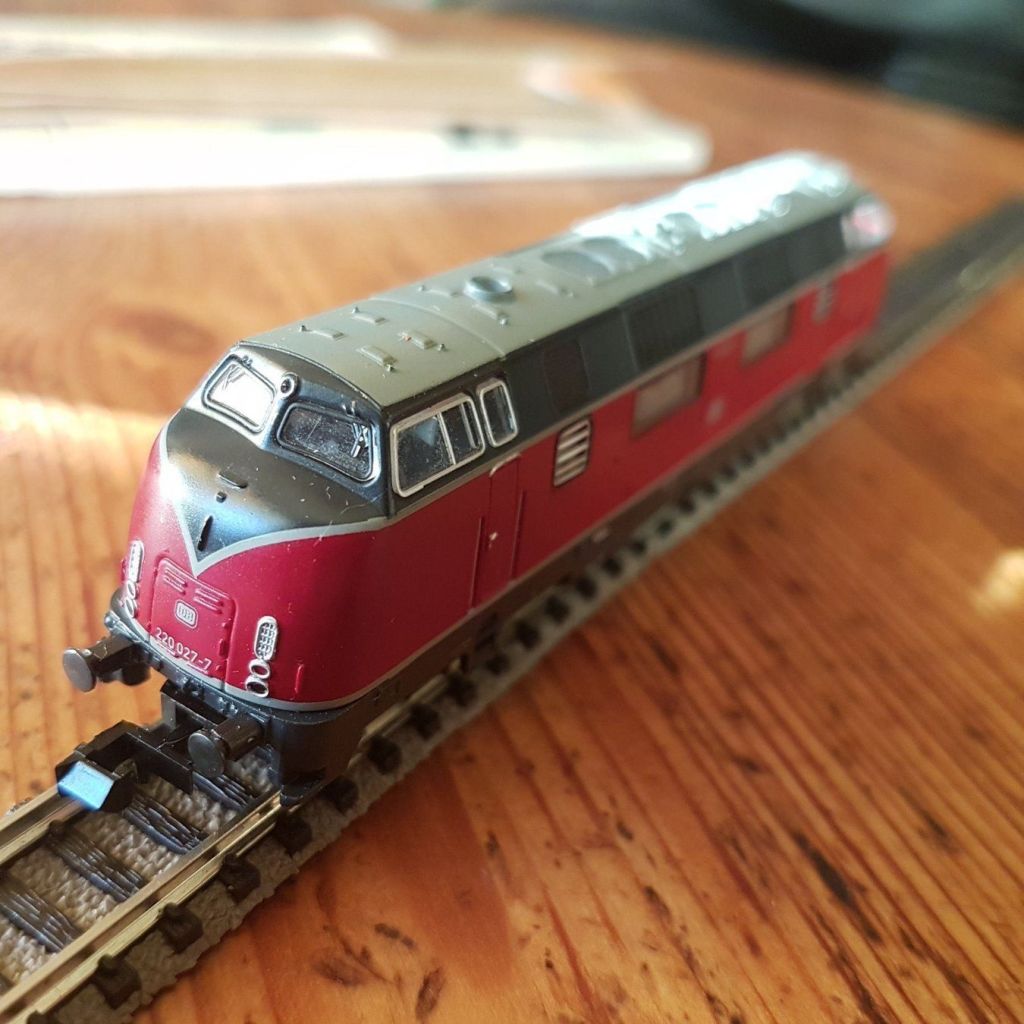
Hacking your Märklin
This library allows you to control your digital Märklin railway using Arduino.
https://code.google.com/archive/p/railuino/
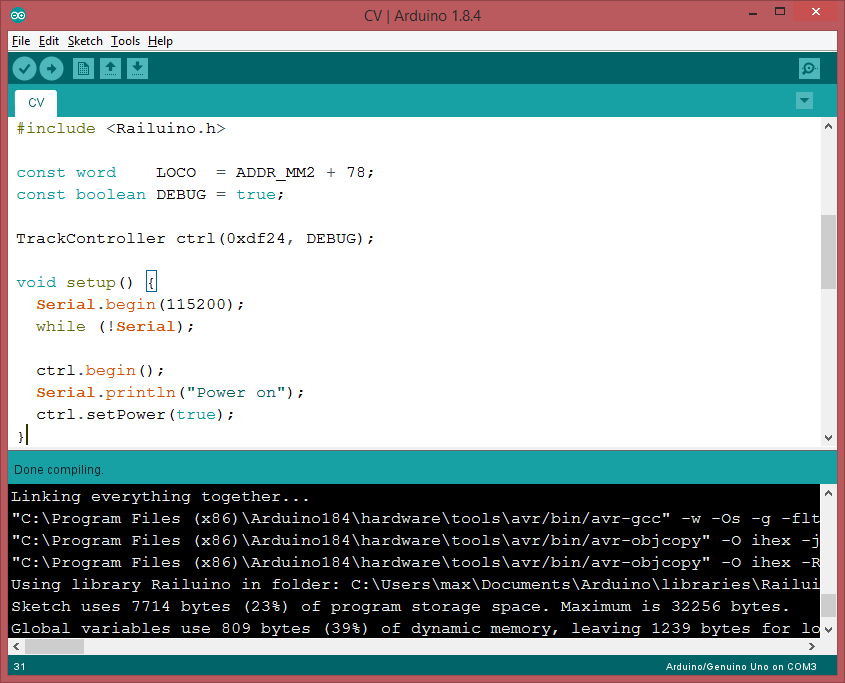
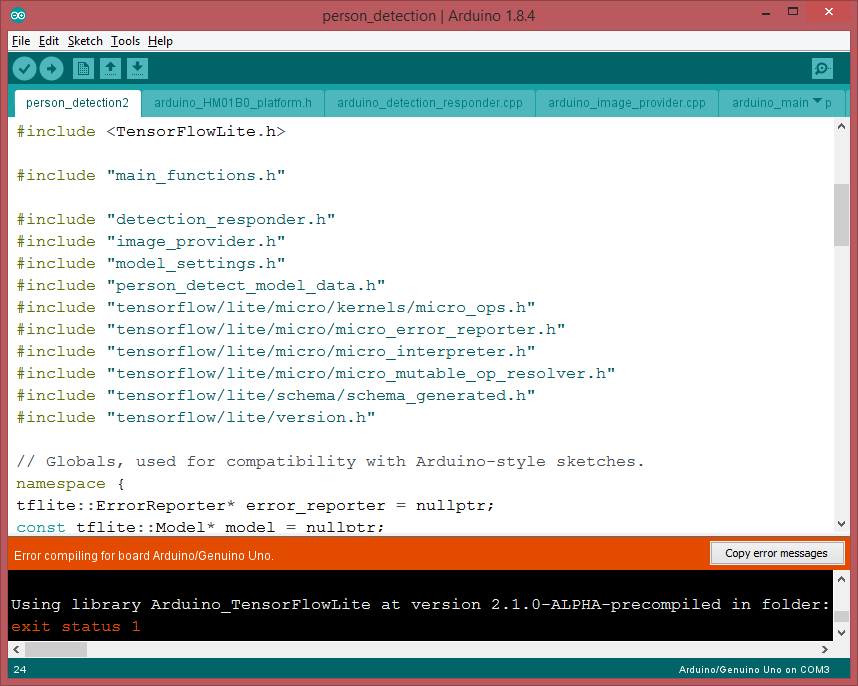
I want to show especially the output of the C++ compiled library
include <Railuino.h>
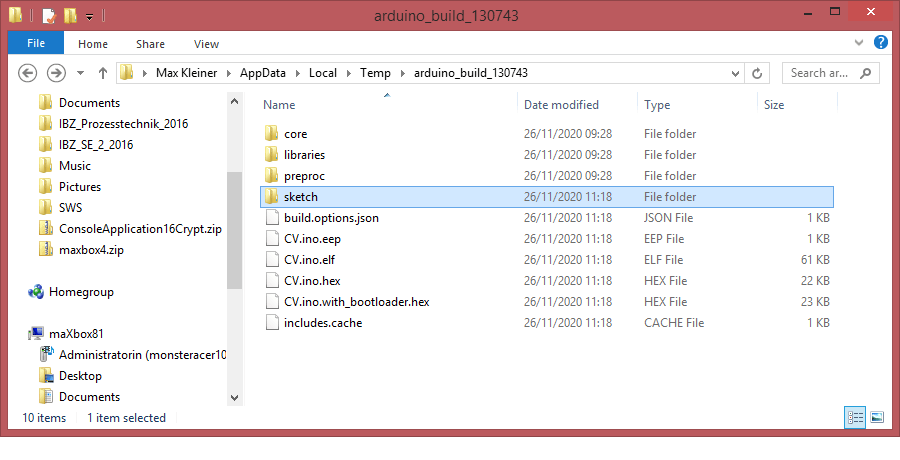
Any ISP will need what Arduino calls output binaries and the rest of the world calls HEX files. These are produced when you Verify/Compile your sketch and contain the data the AVR microcontroller needs to run and in my case “C:\Users\max\AppData\Local\Temp\arduino_build_130743”.
The Arduino IDE creates them in temporary folders in your user libraries. If everything has gone right, your folder should be full of output files, mostly with .o and .d extensions. These are used by linker and can be ignored.
The important files will be these, where the sketch is called CV.ino, so look for your own sketch name – so I show the top 6 files in the right sequence with explanation (below you can see the full verbose log mode):
- CV.ino – the sketch as script before transformed to cpp++
- CV.ino.cpp – output C file, actually C++
- CV.ino.cpp.o – output for the linker
- CV.ino.elf – output file for a debugger
- CV.ino.eep – EEPROM file for programmer
- CV.ino.hex – flash (code) file for programmer
The C file (.cpp) and Elf file (.elf) can be used in AVR Studio development environment if you want to move away from just using Arduino IDE.
The important files for the programmer are the .Hex and .EEP files.
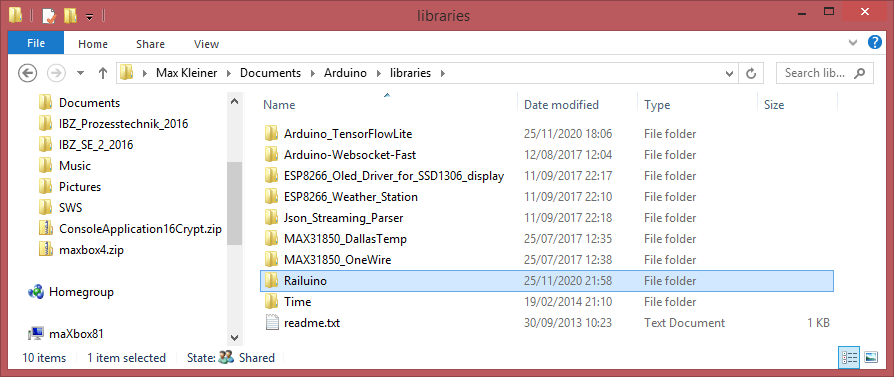
Install the Package (zip)
Installation is easy: Just get the latest release from the downloads page (see above Google Code Archive) and place the contents of the “src” directory in a “Railuino” directory under your Arduino “libraries” directory. I did also a properties file to better integrate in the Arduino IDE with paragraph and includes, but that’s not so important and not a must.
In case of problems:
There are three common causes of the invalid library warning:
1. You saved a sketch to the libraries folder. Sketches are only allowed in that folder as examples inside the folder of a valid library. Fix: move the sketch anywhere else other than the libraries folder.
2. Incorrect installation of a valid library. The library folder must be directly under the libraries folder, not in a sub-folder. This means the library must have either a .h file or a library.properties file in its root folder. Fix: move the library folder to directly under the libraries folder.
3. Something that's neither library nor sketch in the libraries folder. Fix: move it somewhere else, anywhere other than the libraries folder.
Then restart Arduino. You should now see a bunch of new examples that teach you how to use Railuino. The “Misc/Tests” example is a good way of validating your setup.


For documentation on the functions I currently recommend to read the comments in the “Railuino.h” header file. There are also several sets of slides on the downloads page that describe the overall approach and the hardware. Finally, there is a video from LinuxTag and another one from DroidConNL on YouTube.

Full Verbose Log
C:\Program Files (x86)\Arduino184\arduino-builder -dump-prefs -logger=machine -hardware C:\Program Files (x86)\Arduino184\hardware -hardware C:\Users\max\AppData\Local\Arduino15\packages -tools C:\Program Files (x86)\Arduino184\tools-builder -tools C:\Program Files (x86)\Arduino184\hardware\tools\avr -tools C:\Users\max\AppData\Local\Arduino15\packages -built-in-libraries C:\Program Files (x86)\Arduino184\libraries -libraries C:\Users\max\Documents\Arduino\libraries -fqbn=arduino:avr:uno -ide-version=10804 -build-path C:\Users\max\AppData\Local\Temp\arduino_build_130743 -warnings=none -build-cache C:\Users\max\AppData\Local\Temp\arduino_cache_811198 -prefs=build.warn_data_percentage=75 -prefs=runtime.tools.avrdude.path=C:\Program Files (x86)\Arduino184\hardware\tools\avr -prefs=runtime.tools.avr-gcc.path=C:\Program Files (x86)\Arduino184\hardware\tools\avr -prefs=runtime.tools.arduinoOTA.path=C:\Program Files (x86)\Arduino184\hardware\tools\avr -verbose C:\Users\max\Documents\Arduino\libraries\Railuino\src\examples\01.Controller\CV\CV.ino
- CV.ino – the Sketch as Script
C:\Program Files (x86)\Arduino184\arduino-builder -compile -logger=machine -hardware C:\Program Files (x86)\Arduino184\hardware -hardware C:\Users\max\AppData\Local\Arduino15\packages -tools C:\Program Files (x86)\Arduino184\tools-builder -tools C:\Program Files (x86)\Arduino184\hardware\tools\avr -tools C:\Users\max\AppData\Local\Arduino15\packages -built-in-libraries
C:\Program Files (x86)\Arduino184\libraries -libraries C:\Users\max\Documents\Arduino\libraries -fqbn=arduino:avr:uno -ide-version=10804 -build-path C:\Users\max\AppData\Local\Temp\arduino_build_130743 -warnings=none -build-cache C:\Users\max\AppData\Local\Temp\arduino_cache_811198 -prefs=build.warn_data_percentage=75 -prefs=runtime.tools.avrdude.path=C:\Program Files (x86)\Arduino184\hardware\tools\avr -prefs=runtime.tools.avr-gcc.path=C:\Program Files (x86)\Arduino184\hardware\tools\avr -prefs=runtime.tools.arduinoOTA.path=C:\Program Files (x86)\Arduino184\hardware\tools\avr -verbose C:\Users\max\Documents\Arduino\libraries\Railuino\src\examples\01.Controller\CV\CV.ino
Using board ‘uno’ from platform in folder: C:\Program Files (x86)\Arduino184\hardware\arduino\avr
Using core ‘arduino’ from platform in folder: C:\Program Files (x86)\Arduino184\hardware\arduino\avr
Detecting libraries used…
“C:\Program Files (x86)\Arduino184\hardware\tools\avr/bin/avr-g++” -c -g -Os -w -std=gnu++11 -fpermissive -fno-exceptions -ffunction-sections -fdata-sections -fno-threadsafe-statics -flto -w -x c++ -E -CC -mmcu=atmega328p -DF_CPU=16000000L -DARDUINO=10804 -DARDUINO_AVR_UNO -DARDUINO_ARCH_AVR “-IC:\Program Files (x86)\Arduino184\hardware\arduino\avr\cores\arduino” “-IC:\Program Files (x86)\Arduino184\hardware\arduino\avr\variants\standard” “C:\Users\max\AppData\Local\Temp\arduino_build_130743\sketch\CV.ino.cpp” -o “nul”
“C:\Program Files (x86)\Arduino184\hardware\tools\avr/bin/avr-g++” -c -g -Os -w -std=gnu++11 -fpermissive -fno-exceptions -ffunction-sections -fdata-sections -fno-threadsafe-statics -flto -w -x c++ -E -CC -mmcu=atmega328p -DF_CPU=16000000L -DARDUINO=10804 -DARDUINO_AVR_UNO -DARDUINO_ARCH_AVR “-IC:\Program Files (x86)\Arduino184\hardware\arduino\avr\cores\arduino” “-IC:\Program Files (x86)\Arduino184\hardware\arduino\avr\variants\standard” “-IC:\Users\max\Documents\Arduino\libraries\Railuino” “C:\Users\max\AppData\Local\Temp\arduino_build_130743\sketch\CV.ino.cpp” -o “nul”
- CV.ino.cpp
Using cached library dependencies for file: C:\Users\max\Documents\Arduino\libraries\Railuino\Railuino.cpp
Generating function prototypes…
“C:\Program Files (x86)\Arduino184\hardware\tools\avr/bin/avr-g++” -c -g -Os -w -std=gnu++11 -fpermissive -fno-exceptions -ffunction-sections -fdata-sections -fno-threadsafe-statics -flto -w -x c++ -E -CC -mmcu=atmega328p -DF_CPU=16000000L -DARDUINO=10804 -DARDUINO_AVR_UNO -DARDUINO_ARCH_AVR “-IC:\Program Files (x86)\Arduino184\hardware\arduino\avr\cores\arduino” “-IC:\Program Files (x86)\Arduino184\hardware\arduino\avr\variants\standard” “-IC:\Users\max\Documents\Arduino\libraries\Railuino” “C:\Users\max\AppData\Local\Temp\arduino_build_130743\sketch\CV.ino.cpp” -o “C:\Users\max\AppData\Local\Temp\arduino_build_130743\preproc\ctags_target_for_gcc_minus_e.cpp”
“C:\Program Files (x86)\Arduino184\tools-builder\ctags\5.8-arduino11/ctags” -u –language-force=c++ -f – –c++-kinds=svpf –fields=KSTtzns –line-directives “C:\Users\max\AppData\Local\Temp\arduino_build_130743\preproc\ctags_target_for_gcc_minus_e.cpp”
Compiling sketch…
“C:\Program Files (x86)\Arduino184\hardware\tools\avr/bin/avr-g++” -c -g -Os -w -std=gnu++11 -fpermissive -fno-exceptions -ffunction-sections -fdata-sections -fno-threadsafe-statics -MMD -flto -mmcu=atmega328p -DF_CPU=16000000L -DARDUINO=10804 -DARDUINO_AVR_UNO -DARDUINO_ARCH_AVR “-IC:\Program Files (x86)\Arduino184\hardware\arduino\avr\cores\arduino” “-IC:\Program Files (x86)\Arduino184\hardware\arduino\avr\variants\standard” “-IC:\Users\max\Documents\Arduino\libraries\Railuino” “C:\Users\max\AppData\Local\Temp\arduino_build_130743\sketch\CV.ino.cpp” -o “C:\Users\max\AppData\Local\Temp\arduino_build_130743\sketch\CV.ino.cpp.o”
- CV.ino.cpp.o
Compiling libraries…
Compiling library “Railuino”
Using previously compiled file: C:\Users\max\AppData\Local\Temp\arduino_build_130743\libraries\Railuino\Railuino.cpp.o
Compiling core…
Using precompiled core
Linking everything together…
“C:\Program Files (x86)\Arduino184\hardware\tools\avr/bin/avr-gcc” -w -Os -g -flto -fuse-linker-plugin -Wl,–gc-sections -mmcu=atmega328p -o “C:\Users\max\AppData\Local\Temp\arduino_build_130743/CV.ino.elf”
- CV.ino.elf
“C:\Users\max\AppData\Local\Temp\arduino_build_130743\sketch\CV.ino.cpp.o” “C:\Users\max\AppData\Local\Temp\arduino_build_130743\libraries\Railuino\Railuino.cpp.o” “C:\Users\max\AppData\Local\Temp\arduino_build_130743/..\arduino_cache_811198\core\core_arduino_avr_uno_e2943c849c7d54ca2ad3fdc0ef151476.a” “-LC:\Users\max\AppData\Local\Temp\arduino_build_130743” -lm
“C:\Program Files (x86)\Arduino184\hardware\tools\avr/bin/avr-objcopy” -O ihex -j .eeprom –set-section-flags=.eeprom=alloc,load –no-change-warnings –change-section-lma .eeprom=0 “C:\Users\max\AppData\Local\Temp\arduino_build_130743/CV.ino.elf” “C:\Users\max\AppData\Local\Temp\arduino_build_130743/CV.ino.eep”
- CV.ino.eep
“C:\Program Files (x86)\Arduino184\hardware\tools\avr/bin/avr-objcopy” -O ihex -R .eeprom “C:\Users\max\AppData\Local\Temp\arduino_build_130743/CV.ino.elf” “C:\Users\max\AppData\Local\Temp\arduino_build_130743/CV.ino.hex”
- CV.ino.hex
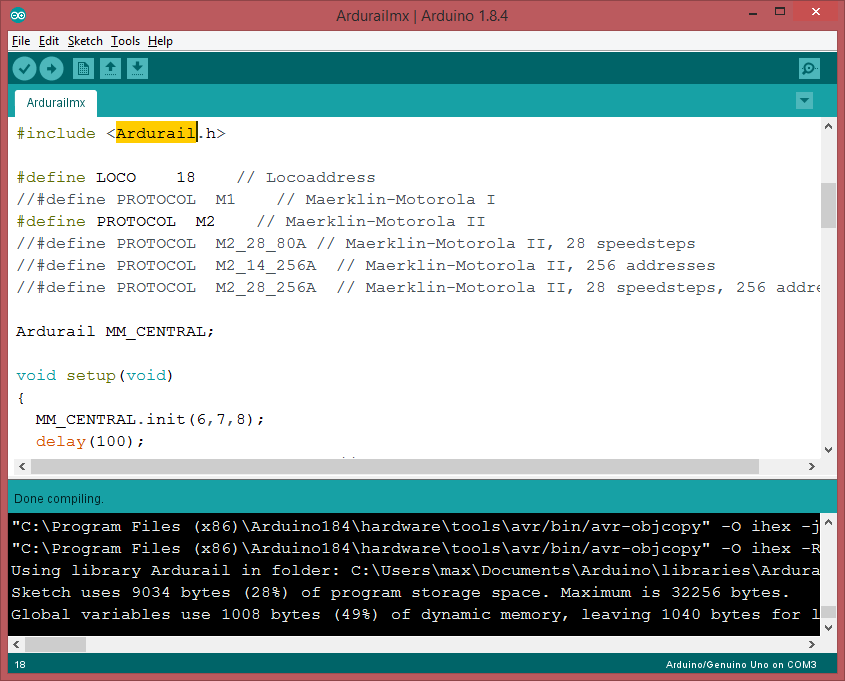
Using library Railuino in folder: C:\Users\max\Documents\Arduino\libraries\Railuino (legacy)
Sketch uses 7714 bytes (23%) of program storage space. Maximum is 32256 bytes.
Global variables use 809 bytes (39%) of dynamic memory, leaving 1239 bytes for local variables. Maximum is 2048 bytes.
There’s a second framework called Ardurail.
https://sourceforge.net/p/ardurail/wiki/Home/
This library allows you to create a digital Märklin(tm)-Motorola(tm) compatible signal for driving model-rail locomotives and track switches. You also need:
- a booster (a kind of digital amplifier, see http://en.wikipedia.org/wiki/Digital_model_railway_control_systems#Booster)
- some external controller (light pots, switches, buttons, …) or
- some external hard/software which speaks the Märklin(tm) P50-protocol over a serial interface (like [RocRail (http://wiki.rocrail.net) or [srcpd (http://srcpd.sourceforge.net/) in conjunction with the derived Ardurail_P50 class.


function ColorToGray(Color: TColor): TColor;
var L: Byte;
begin
L:= round(0.2126*GetRValue(Color)+0.7152*GetGValue(Color)+0.0722*
GetBValue(Color));
Result:= RGB(L, L, L);
end;
procedure TBitmapHelperSaveAsPPM_4(FileName: TFileName; abit: TBitmap;
useGrayScale: Boolean);
var
i, j: Integer;
Header: AnsiString;
ppm: TMemoryStream;
agb: TBytes;
begin
ppm:= TMemoryStream.Create;
try
Header:= Format('P6'#10'%d %d'#10'255'#10, [abit.Width, abit.Height]);
writeln(Header);
ppm.WriteBuffer((Header), Length(Header));
setlength(agb,3)
for i:= 0 to abit.Width- 1 do
for j:= 0 to abit.Height- 1 do begin
if useGrayScale then
agb:= InttoBytes(ColorToGray(ColorToRGB(abit.Canvas.Pixels[j,i])))
else
agb:= InttoBytes(ColorToRGB(abit.Canvas.Pixels[j,i]));
ppm.Write(stringOf(agb), 3);
//ppm.Write(BytetoString(rgb), 3);
end;
ppm.SaveToFile(FileName);
finally
ppm.Free;
end;
end;
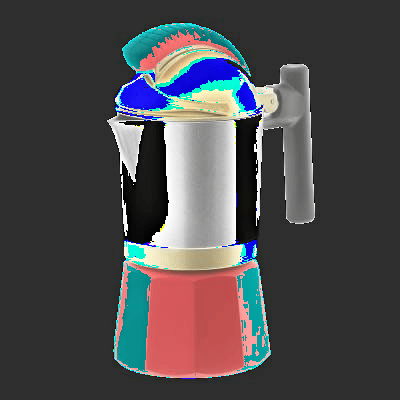
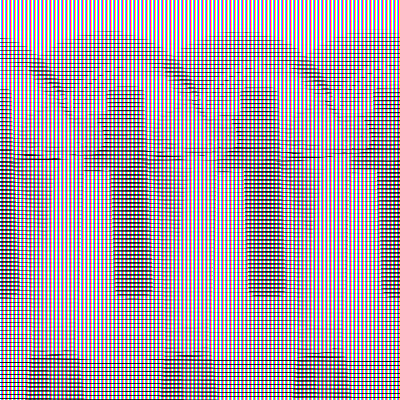
bitmap:= TBitmap.Create;
bitmap.LoadFromFile(exepath+'\web\coffeemax.bmp');
//SaveAsPPM('Output.ppm');
writeln(itoa(bitmap.width))
TBitmapHelperSaveAsPPM_4(exepath+'\web\coffeemaxg.ppm', bitmap, true);
bitmap.Free;
//http://paulcuth.me.uk/netpbm-viewer/
//https://rosettacode.org/wiki/Bitmap/Read_a_PPM_file#Delphi
function ReadCharM(ppm: TMemoryStream): AnsiChar;
var mystr: string;
  begin
    writeln(itoa(ppm.size))
    SetLength(mystr, 1);
    //insize:= MemStream.read(strBuff2, length(strBuff2));
    ppm.Read(mystr, length(mystr));
    result:= mystr[1];
    writeln('res: '+(mystr))
  end;
Artificial Intelligence and Machine Learning are much trending and also confused terms nowadays. Machine Learning (ML) is a subset of Artificial Intelligence. ML is a science of designing and applying algorithms that are able to learn things from past cases. If some behaviour exists in past, then you may predict if or it can happen again. Means if there are no past cases then there is no prediction. […]

Cologne

This was also a personal moment cause we have been visited the first Maker Faire in 2013 at Hannover! and the initiator of Railuino Jörg Pleumann had this presentation at the Maker Faire Hannover on a very hot summer day 03.08.2013 with a great pleasure and full of rich details.
LikeLike
Modelleisenbahnen sind heute eine extrem digialisierte Geschichte, bei der das Gleis sowohl die Betriebsspannung liefert als auch als Datenbus zu den Loks dient. Wenn man eine Märklin-Bahn mit dem Rechner oder dem Handy steuern möchte, braucht man zusätzlich zu Gleisen und Rollmaterial Digital-Equipment für 500-1000 Euro aufwärts (Central Station, Router, iPhone). Der Vortrag stellt eine Alternative vor: Es gibt zwei günstige Anschlussboxen, die in vielen Startpackungen zu finden sind: Eine sehr einfache IR-Fernbedienung und eine kabelgebundene sogenannte Mobile Station. Mit Hilfe des Arduino lassen sich beide leicht “hacken”. Der Arduino erzeugt in diesem Fall die Signale, die eigentlich das Handgerät erzeugen würde. Zusätzlich kann der Arduino zum Beispiel per Ethernet mit anderen Geräten verbunden werden. Damit lassen sich mit relativ wenig finanziellem Aufwand, etwas Zeit und viel Spaß Anwendungsszenarien umsetzen, die sonst der High-End-Hardware vorbehalten sind. Zusätzlich zeigt der Vortrag, wie ein standardisierter Rückkanal (“S88-Bus”) mit dem Arduino implementiert werden kann. Dieser liefert Feedback darüber, welche Gleise von Zügen passiert werden. Beide Mechanismen zusammen ergeben eine einfache, erweiterbare und auf Wunsch sogar autonome Steuerung für die Modellbahn.
LikeLike